We created tags in Outlign to help agencies manage rounds of revisions and avoid doing work you are not being paid for.
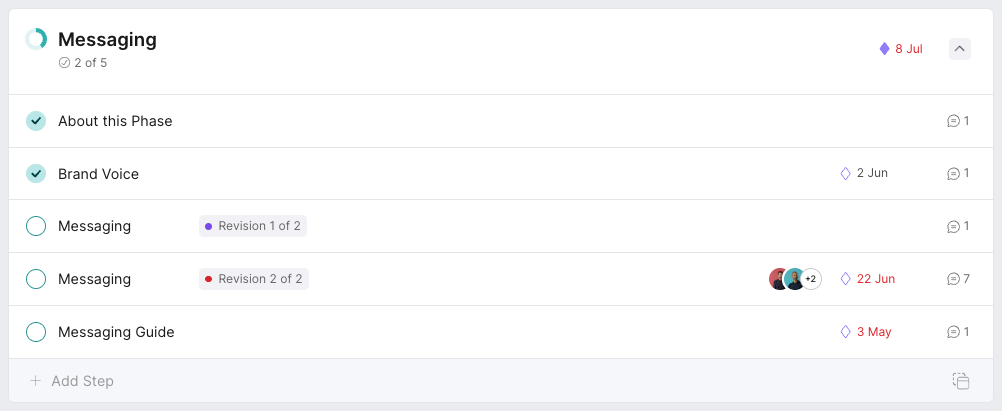
If your scope of work includes two rounds of revisions, your process should clearly reflect that promise. You could create tags such as:
Round 1 of 2
Round 2 of 2
Applying these tags to the relevant steps makes it clear to everyone where the project currently sits.
This protects the client by showing exactly what has been included in the agreed scope. It also protects your agency by making it clear when the included revision rounds have been completed and any further changes may need to be quoted separately.
Rather than relying on your team to remember which round you are up to, or repeatedly explaining it to the client, the tag stays visible on the step.
Revision rounds are the primary use case, but tags can be used for any additional context that is helpful to your team or client. For example:
Urgent
Client request
Awaiting approval
Budget approved
Out of scope
You can also apply multiple tags to the same step when more than one label is relevant.
Tags are added from the individual step view.
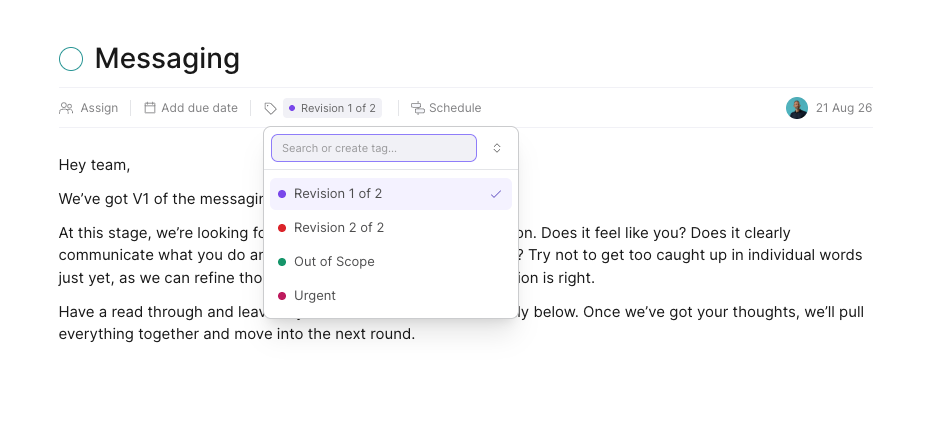
Select the step you want to update.
Click Add tag at the top of the step.
Search for an existing tag or create a new one.
Select the tag to apply it to the step.
Once added, the tag will appear at the top of the step.
Click Add tag and begin typing the tag name.
Outlign will filter the available tags as you type. Select the relevant tag from the list to apply it to the step.
Using existing tags helps keep naming and colours consistent across your process.
If the tag you need does not already exist:
Click Add tag.
Type the name of your new tag.
Select Create “[tag name]”.
Choose a colour for the tag.
Save your changes.
The new tag will then be available to use on other steps.
A step can have more than one tag.
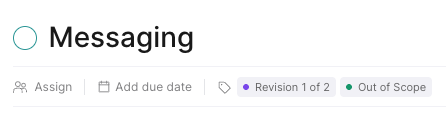
After adding the first tag, select any additional tags you want to apply. This can be useful when a step belongs to a revision round but also needs another label, such as Urgent or Client request.
To remove a tag from an individual step:
Open the step.
Click the tag menu.
Select the currently applied tag again to deselect it.
This removes the tag from that step without deleting the tag itself, so it can still be used elsewhere.
To update an existing tag:
Open the tag menu from a step.
Open the edit option for the relevant tag.
Change the tag name or select a different colour.
Click Save.
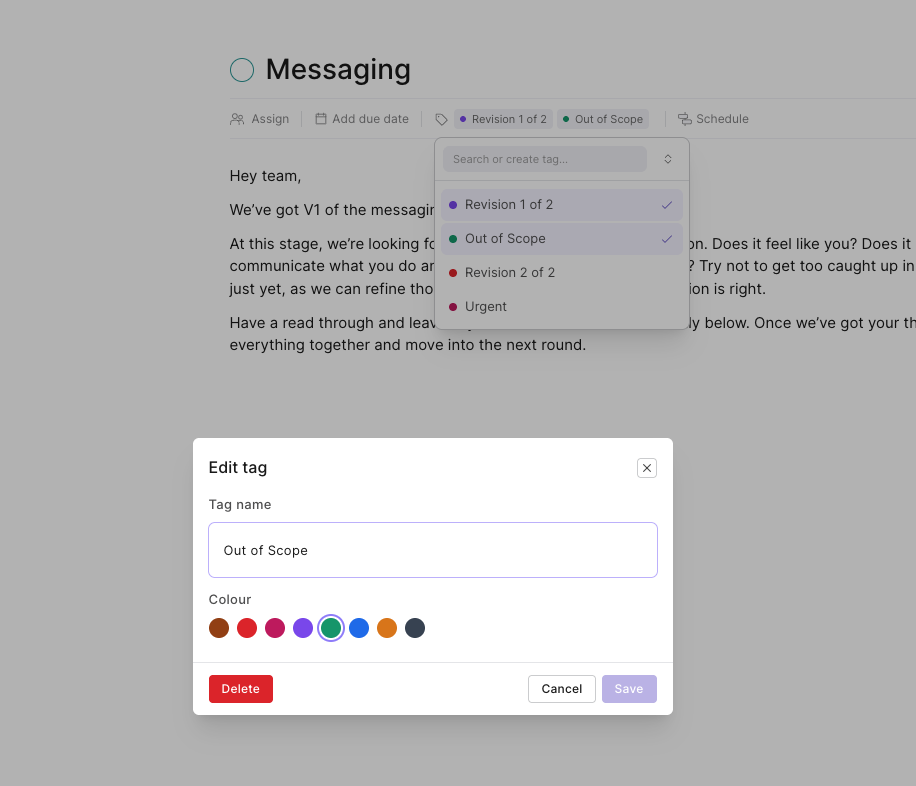
Colours can help related tags feel like part of the same system. For example, you might use one colour for revision rounds and another for approval or budget-related tags.
To permanently delete a tag:
Open the tag’s edit window.
Click Delete.
Confirm that you want to remove it.
Deleting a tag removes the tag itself, not the steps it was applied to. If you only want to remove it from one step, deselect it instead of deleting it.
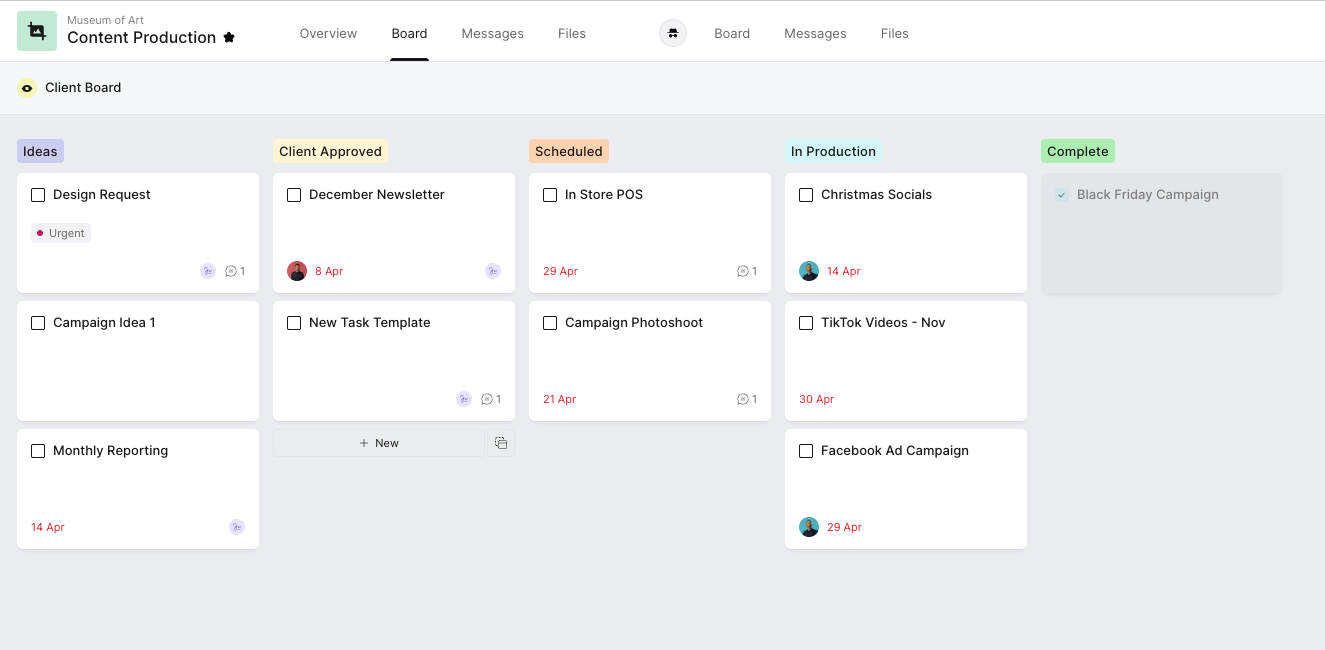
Tags work the same way in Board view. Open a card to search for, create, add, edit or remove tags just as you would on a process step.
Applied tags also appear directly on the card, making important information easy to see while viewing the board.
Match your revision tags to the language used in your scope of work.
Use consistent names, such as Round 1 of 2 and Round 2 of 2.
Give related tags consistent colours so they are easy to recognise.
Add important tags to your process templates so they are included from the beginning of every project.
Keep tags focused on information that your team or client genuinely needs to see.
Tags work best as a simple visual layer over your process. Used consistently, they make expectations clearer, reduce misunderstandings and help keep projects within the agreed scope.